
有時候我們網站使用Identity的很大原因,是前端網站要讓使用者可以用Facebook Login,但是最近Facebook實在是改的太兇了,原本很簡易的參數設定就能用,現在卻會出現錯誤:無法載入網址: 這個網址的網域未包含在應用程式的網域中。若要載入這個網址,請在應用程式設定的「應用程式網域」欄位中新增應用程式的所有的網域及子網域。
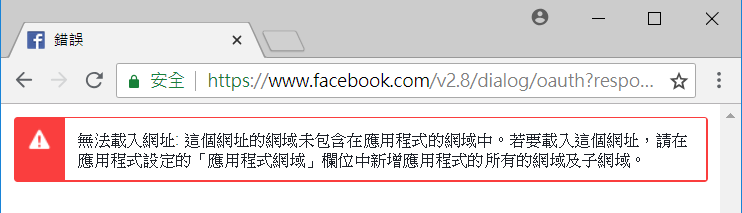
解決方式說明如下:
有時候我們網站使用Identity的很大原因,是前端網站要讓使用者可以用Facebook Login,但是最近Facebook實在是改的太兇了,原本很簡易的參數設定就能用,現在卻會出現錯誤:無法載入網址: 這個網址的網域未包含在應用程式的網域中。若要載入這個網址,請在應用程式設定的「應用程式網域」欄位中新增應用程式的所有的網域及子網域。
解決方式說明如下:
常常被客戶要求 Google Analytics 要設定按鈕事件,所以先筆記起來一下
<a class="doc-dl xls" title="下載 Excel" href="/TC/OPENDATA/Comm1_MEMBER.xls">Excel</a>
<a class="doc-dl pdf" title="下載 PDF" href="/TC/OPENDATA/Comm1_MEMBER.pdf">pdf</a>
<a class="doc-dl csv" title="下載 CSV" href="TC/OPENDATA/Comm1_MEMBER.csv">csv</a>
<a class="doc-dl xml" title="下載 XML" href="/TC/OPENDATA/Comm1_MEMBER.xml">xml</a>
<!-- Global site tag (gtag.js) - Google Analytics -->
<script async src="https://www.googletagmanager.com/gtag/js?id=追蹤碼"></script>
<script>
    window.dataLayer = window.dataLayer || [];
    function gtag() {
        dataLayer.push(arguments);
    }
    gtag('js', new Date());
    gtag('config', '追蹤碼');

    function download_tracking(e) {
        var addressValue = e.toString();
        addressValue = addressValue.replace('網站domain', '');
        gtag('event', '下載', {
           'event_category': 'OpenData',
           'event_label': addressValue
    });
}
</script>
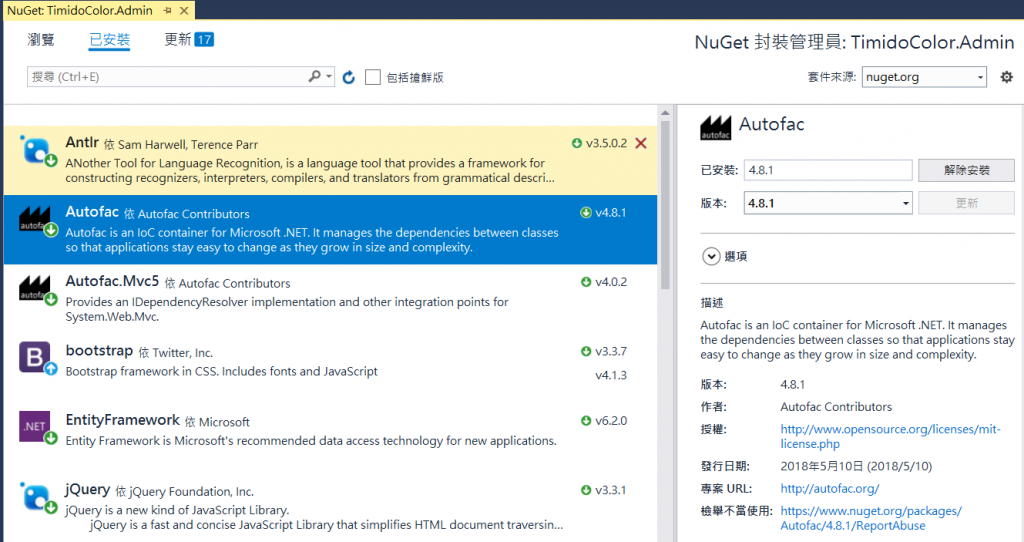
Step01. 安裝 Autofac
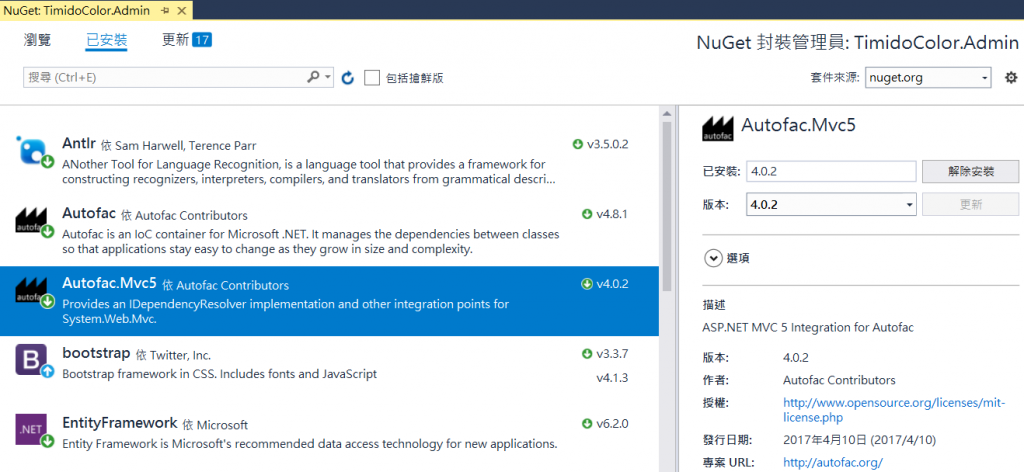
Step02. 安裝 Autofac.Mvc5
Step03. 在 App_Start 加入 AutofacConfig.cs
public class AutofacConfig
{
    public static void Bootstrapper()
    {
        var builder = new ContainerBuilder();

        builder.RegisterControllers(Assembly.GetExecutingAssembly());

        builder.RegisterType<TimidoColorDB>()
        .As<ITimidoColorDB>()
        .InstancePerRequest();

        var services = Assembly.Load("TimidoColor.Services");
        builder.RegisterAssemblyTypes(services).AsImplementedInterfaces();

        var helper = Assembly.Load("TimidoColor.Core");
        builder.RegisterAssemblyTypes(helper).AsImplementedInterfaces();

        builder.RegisterFilterProvider();

        IContainer container = builder.Build();
        DependencyResolver.SetResolver(new AutofacDependencyResolver(container));
    }
}
Step04. Global.asax 加入 AutofacConfig.Bootstrapper();
protected void Application_Start()
{
    AutofacConfig.Bootstrapper();

    AreaRegistration.RegisterAllAreas();
    FilterConfig.RegisterGlobalFilters(GlobalFilters.Filters);
    RouteConfig.RegisterRoutes(RouteTable.Routes);
    BundleConfig.RegisterBundles(BundleTable.Bundles);
}
我們常常在Web.config 的 appSettings 設定一些參數,如活動到期日,但我們也可以考慮將這些自訂參數的部分,設定在專案的設定檔裡,操作如下:
ASP.NET MVC實作授權方式有兩種,一個是Identity 2.0方式,另一種是使用Forms Authentication,兩個方式都還有滿多工程師在用的。
現在我們先使用 Forms Authentication 的方式來實作會員登入。
目前以ASP.NET MVC分層概念來說,我個人至少會分為 Model、Service、UI,實作如下
Step01.選擇空白方案
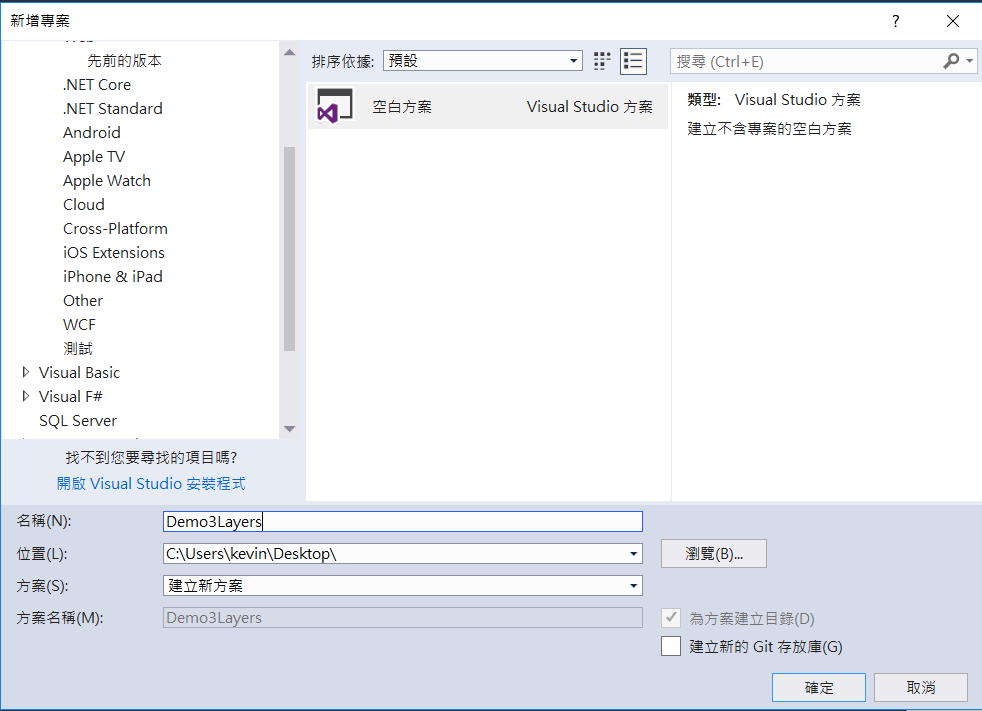
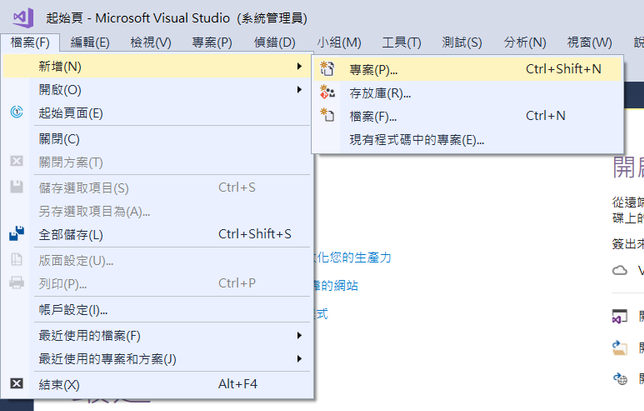
Step01. 開新的專案
閱讀全文〈從 ASP.NET MVC 開新專案說起〉
如果使用ADO.NET實體資料模型來產生資料庫的Model,你會發現Web.config 的資料連線有點小複雜,多了 metadata 的一些宣告,如
<connectionStrings><add name="ProjectDBEntities" connectionString="metadata=res://*/AllModels.csdl|res://*/AllModels.ssdl|res://*/AllModels.msl;provider=System.Data.SqlClient;provider connection string="data source=(LocalDb)\MSSQLLocalDB;initial catalog=ProjectDB;integrated security=True;MultipleActiveResultSets=True;App=EntityFramework"" providerName="System.Data.EntityClient" /> </connectionStrings>
如用EntityFramework Reverse POCO Generator,則可用一般的連線字串即可
 <connectionStrings>
<add name="ProjectDBEntity" connectionString="Data Source=(LocalDb)\MSSQLLocalDB;initial catalog=ProjectDB;persist security info=True; Integrated Security=SSPI;" providerName="System.Data.SqlClient" />
</connectionStrings>
首先到 Visual Studio Market Place
下載安裝 EntityFramework Reverse POCO Generator
閱讀全文〈使用 EntityFramework Reverse POCO Generator〉
這應該是剛開始學ASP.NET MVC 常犯的錯誤,一般我們會新增一個資料夾”Helpers”來放 HtmlHelper的程式,如在資料夾新增一個class,如:HMTLHelperExtensions.cs。
using System;
using System.Web.Mvc;

namespace DemoCustomIndentity.Helpers
{
    public static class HMTLHelperExtensions
    {
       public static string IsSelected(this HtmlHelper html, string controller = null, string action = null, string cssClass = null)
       {

          if (String.IsNullOrEmpty(cssClass))
          cssClass = "active";

          string currentAction = (string)html.ViewContext.RouteData.Values["action"];
          string currentController = (string)html.ViewContext.RouteData.Values["controller"];

          if (String.IsNullOrEmpty(controller))
          controller = currentController;

         if (String.IsNullOrEmpty(action))
         action = currentAction;

         return controller == currentController && action == currentAction ?
         cssClass : String.Empty;
       }

    public static string PageClass(this HtmlHelper html)
    {
       string currentAction = (string)html.ViewContext.RouteData.Values["action"];
       return currentAction;
     }
   }
}
Step01.新增一個含有identity的專案範本
Step02.將專案的identity角色功能打開
在App_Start的IdentityConfig.cs 加入
//增加角色管理員相關的設定
public class ApplicationRoleManager : RoleManager<IdentityRole>
{
    public ApplicationRoleManager(IRoleStore<IdentityRole, string> roleStore): base(roleStore)
    {
    }

    public static ApplicationRoleManager Create(IdentityFactoryOptions<ApplicationRoleManager> options, IOwinContext context)
    {
        return new ApplicationRoleManager(new RoleStore<IdentityRole>(context.Get<ApplicationDbContext>()));
    }
 }
在App_Start的 Startup.Auth.c s的 public void ConfigureAuth(IAppBuilder app) 加入
//增加角色的OwinContext
app.CreatePerOwinContext<ApplicationRoleManager>(ApplicationRoleManager.Create);
以上這兩個步驟,專案的identity 就具備Role的功能了
Step03.Install-Package MvcSiteMapProvider.MVC5 -Version 4.6.22